One of the biggest challenges when creating a custom website for clients is how to integrate unique elements that the design calls for with administration of the site. In previous versions of WordPress, a shortcode or page template may have been used along with some meta fields on the page – but that was before. Gutenberg (aka the Block Editor) is the latest iteration and it’s important that the same methodology holds true – websites should be created be beautiful and usable to visitors and administrators alike.
Creating custom Blocks for WordPress is outlined in their Block Editor Handbook and is generally done with Node, NPM and React. I’ll get into that in a separate write-up but in this instance I’m looking for something that might lend itself to re-tooling older PHP code from shortcodes or templates and dropping those right into a Block interface.
Enter Advanced Custom Fields (ACF)
I’ve been a big fan of ACF for years now and include it with all of the custom websites created here. It’s simple, yet very powerful. It’s features and clean approach to page options are well thought out and simple for clients to manage on their own. The addition of Blocks as one of their features is no exception. Note, you will need the “Pro” version in order to create options for blocks.
Below I’ll walk through creating a custom (very simple) Block with ACF from start to finish.
Creating The Framework
The first thing we’ll do is register a block type with ACF. Either in your functions.php file or a plugin (better), add the following:
functions.php
function custom_register_blocks() {

    // check if function exists
    if ( function_exists( 'acf_register_block_type' ) ) {

        // register the custom block "my_block"
        acf_register_block_type(array(
            'name'			=> 'my_block',
            'title'			=> __( 'My Custom Block' ),
            'description'		=> __( 'This is my custom block' ),
            'render_template'           => 'blocks/my_block.php',
            'category'			=> 'common',
            'icon'			=> 'hammer',
 // https://developer.wordpress.org/resource/dashicons/#hammer
	    'keywords'			=> array( 'custom', 'hello', 'hello-world', 'hello world', 'world' ),
	    'supports'			=> array(
                'align' => false
            )
        ));


    }

}
add_action('acf/init', 'custom_register_blocks');
We’ve now registered the block, given it a name, title, description and so forth. Note that the render template is relative to your active theme. To use it within a plugin, use plugin_dir_path( FILE ) . ‘/blocks/my_block.php’ to define the absolute path. Choose the icon you’d like from the Dashicons site. More info on this function can be found here.
Adding The Options
As you may have noticed from the keywords above, we’ll be creating a classic “Hello World” block, with a slight twist. To add the options in, navigate to Custom Fields → Add New to create a new Field Group.
Give the new Field Group a title of “Block: My Block” to follow convention. Add field options. In this case, we’re only adding in a single field for displaying a signed-in user’s Nickname.
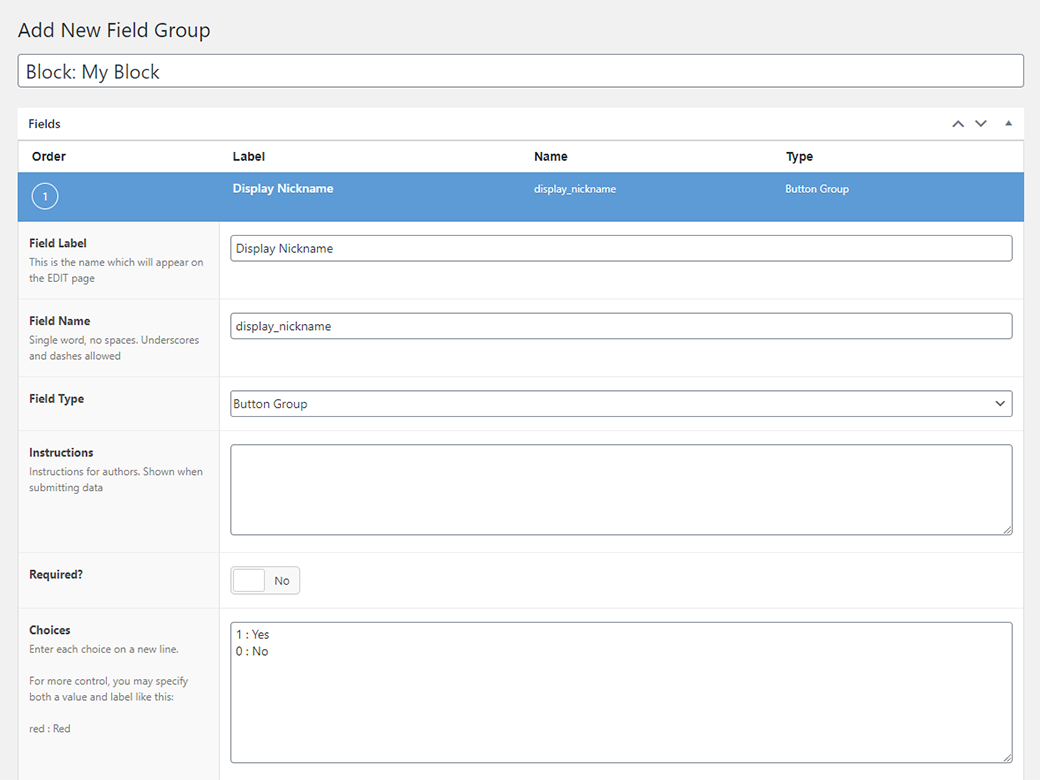
Once the field is created, assign it to the Block that was registered with the acf/init hook, then Publish the field group.
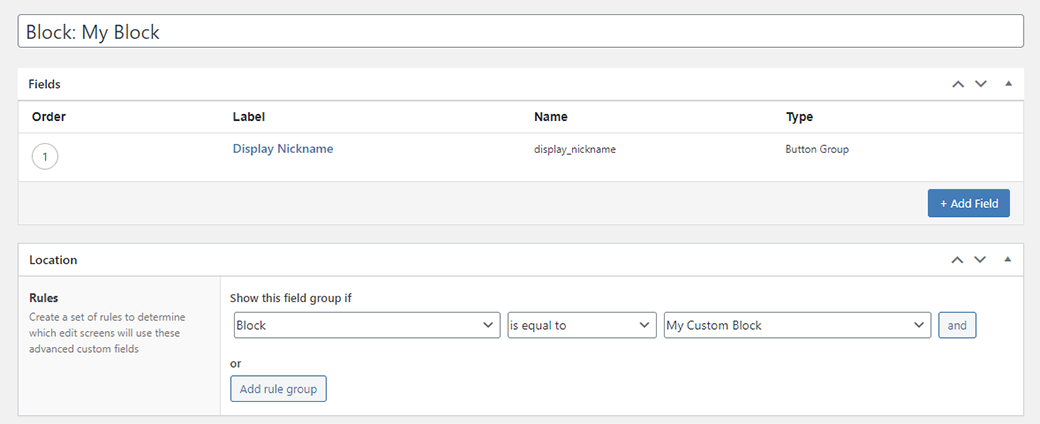
Creating The Template
After registering our Block and adding the Field Group, we’ll need to create a PHP template to display the Block. In this example, the file is within the theme/blocks/my_block.php file. It’s good to name your file with the same convention as your block name so that you can keep it straight later. Below is a modified version of the example given here.
theme/blocks/my_block.php
<?php

/**
 * My Block Template.
 *
 * @param   array $block The block settings and attributes.
 * @param   string $content The block inner HTML (empty).
 * @param   bool $is_preview True during AJAX preview.
 * @param   (int|string) $post_id The post ID this block is saved to.
 */

// Create id attribute allowing for custom "anchor" value.
$id = 'hello-world-' . $block['id'];
if( !empty( $block['anchor'] ) ) {
    $id = $block['anchor'];
}

// Create class attribute allowing for custom "className" and "align" values.
$className = 'hello-world';
if( !empty( $block['className'] ) ) {
    $className .= ' ' . $block['className'];
}

$name = 'World'; // default
$display_nickname = boolval( get_field('display_nickname') );
if ( $display_nickname && is_user_logged_in() ) {
    $current_user = wp_get_current_user();

    $name = $current_user->display_name !== $current_user->user_login ? esc_html( $current_user->display_name ) : 'You...';
}

?>
<div id="<?= esc_attr( $id ); ?>" class="<?= esc_attr( $className ); ?>">
    <blockquote>
        Hello <?= $name ?>!
    </blockquote>
</div>
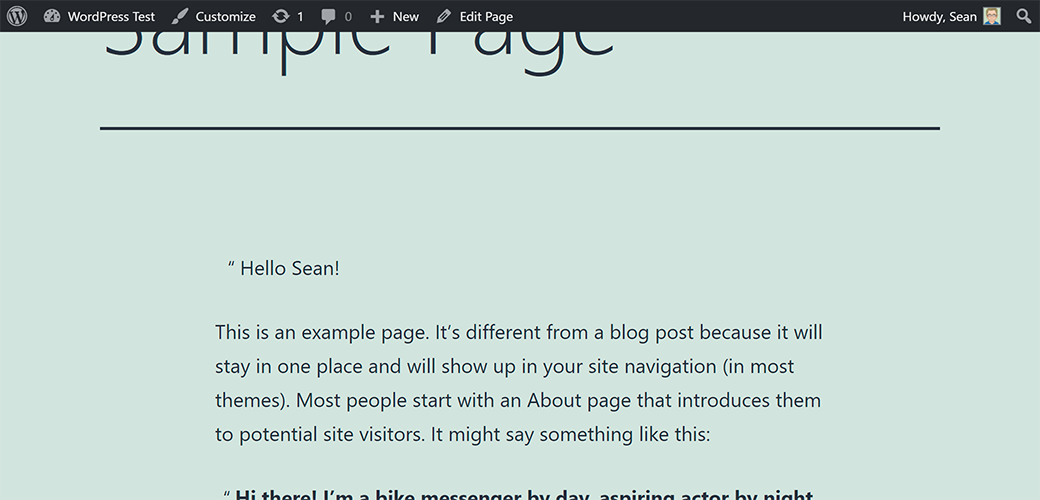
In the example above, the default will be to display “Hello World!”, but if the user is logged in and their display name is different than their login (which you never want to display) it’ll show their display name.
Adding To A Page
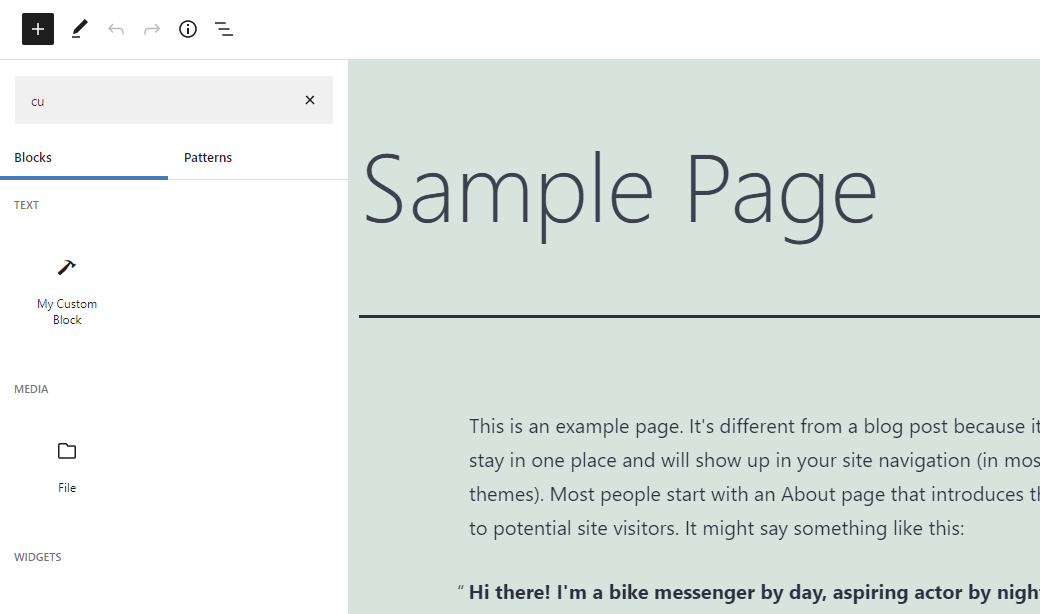
Now that we have all of the components built, add our custom block to the page. You’ll notice that searching for “cu”… will filter to our custom block (or any of our keywords defined in the register function), so make sure that your keywords are relevant.
Once you add the block to the page, you’ll see that the ACF options appear on the right side of your screen under the Block options. Choosing “Yes” will insert the logged in user’s display name and “No” will display “Hello World!”
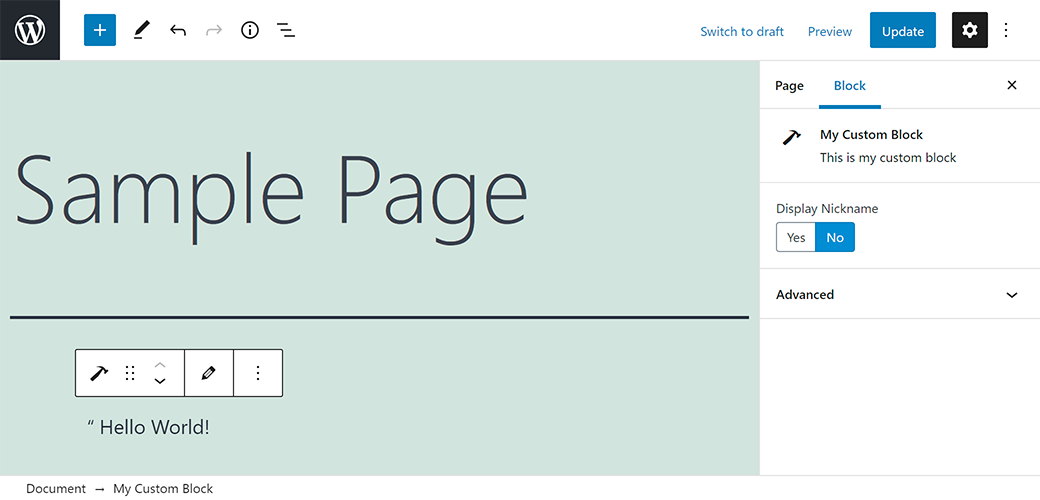
Here’s what it will look like on the frontend.
Wrapping Up
This was a very simple example of how ACF can integrate with Blocks, but the ease of creating new Blocks and using previously developed PHP code—with a little refactoring—makes it a strong choice for those not that comfortable with the new JavaScript methods or looking to modernize older content. Here at Seismic Pixels, I’ve used this approach in web development for custom galleries, maps, post types and more.
For more information, check out the official Advanced Custom Fields documentation.
Thanks for reading, and good luck on your own WordPress projects!
